Add checkbox in excel mac, how to add a checkbox in excel 365, how to add a checkbox in excel 2013, excel add checkbox to multiple cells, how to add a checkbox in excel, how to add a checkbox in powerpoint, how to screenshot on pc,
Creating checkboxes in Excel can be a useful tool when you need to quickly sort and organize large amounts of data. But did you know that you can also create checkboxes within cells? In this article, we will explore the process of making cell checkboxes in Excel 2018.
What are Cell Checkboxes?
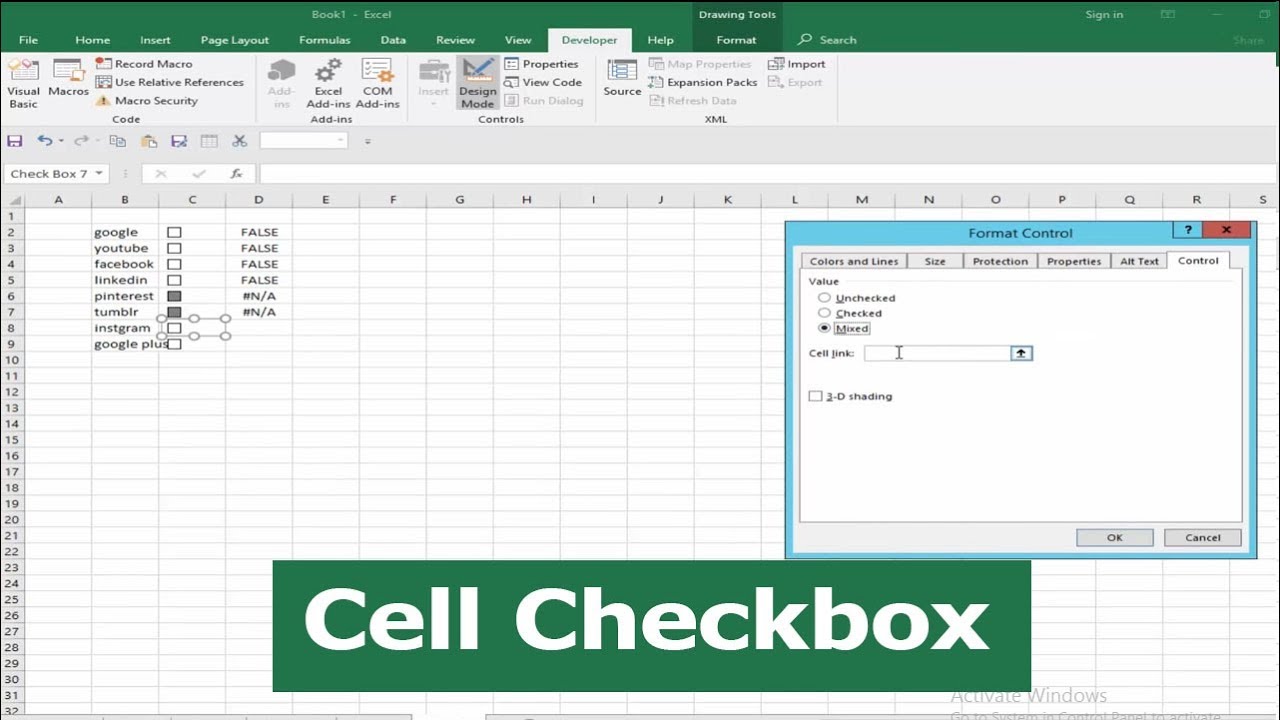
When we talk about checkboxes in Excel, most people think of the ones that you see in forms or surveys. Those checkboxes are typically added outside of the cells themselves and are used for visual organization. However, cell checkboxes are different in that they are added within the cells themselves. This makes them useful for sorting and filtering data directly from the cells.
How to Create Cell Checkboxes in Excel
The process of creating cell checkboxes is relatively simple. Follow the steps below to get started:
- Select the cells where you want to add checkboxes. You can select multiple cells at once by clicking and dragging your mouse.
- Click on the "Data" tab in the Excel ribbon.
- Click on the "Data Validation" button.
- In the Data Validation window, select "List" from the "Allow" dropdown menu.
- In the "Source" field, enter "TRUE,FALSE". This is the list of options that will appear in the checkboxes.
- Check the "In-cell dropdown" box.
- Click "OK".
Using Cell Checkboxes in Excel
Now that you have created cell checkboxes in your Excel document, you can start using them to sort and filter your data. An easy way to do this is to create a filter using the checkboxes. Here's how:
- Select the column where you want to apply the filter. For example, if you have a list of tasks with checkboxes in column A, you would select column A.
- Click on the "Filter" button in the Excel ribbon.
- Click on the dropdown menu for the column you want to filter.
- Expand the "Checkboxes" option.
- Select the checkboxes that you want to include in the filter.
- Click "OK".
Your filtered data will now appear in the Excel sheet. You can update the filter at any time by re-selecting the checkboxes you want to include.
Tips for Using Cell Checkboxes in Excel
Now that you know how to create and use cell checkboxes in Excel, here are some tips for using them effectively:
- Use descriptive labels for your checkboxes. This will make it easier to understand what you are filtering later on.
- Keep your checkbox lists short. When you have too many options to choose from, it can be overwhelming and defeat the purpose of using checkboxes for quick organization.
- Use the "Clear Filter" option to start fresh with your data.
Conclusion
Cell checkboxes are an excellent tool for organizing and filtering data in Excel. With just a few quick steps, you can add checkboxes directly to your cells and start sorting your data with ease. Remember to keep your checkboxes labeled and organized to make the most out of this useful feature.
Happy sorting!


